Using Codespaces Effectively For Machine Learning
Shawn Phy / April 2024 (819 Words, 5 Minutes)
Introduction
Often times when training a machine learning model I end up having to use either google colab or kaggle. The reason for this is because my flimsy laptop might not be cut out for the job or if it does, it will take a ridiculous amount of time. Absolutely unnaceptable!
They also say beauty lies in the eyes of the beholder but I believe the way I have setup my code editor looks very pretty and convenient(like any developer does). In light of this I might not want to give up my local development environment for a cloud based one.
Enter github and azure workspaces
Github Codespace
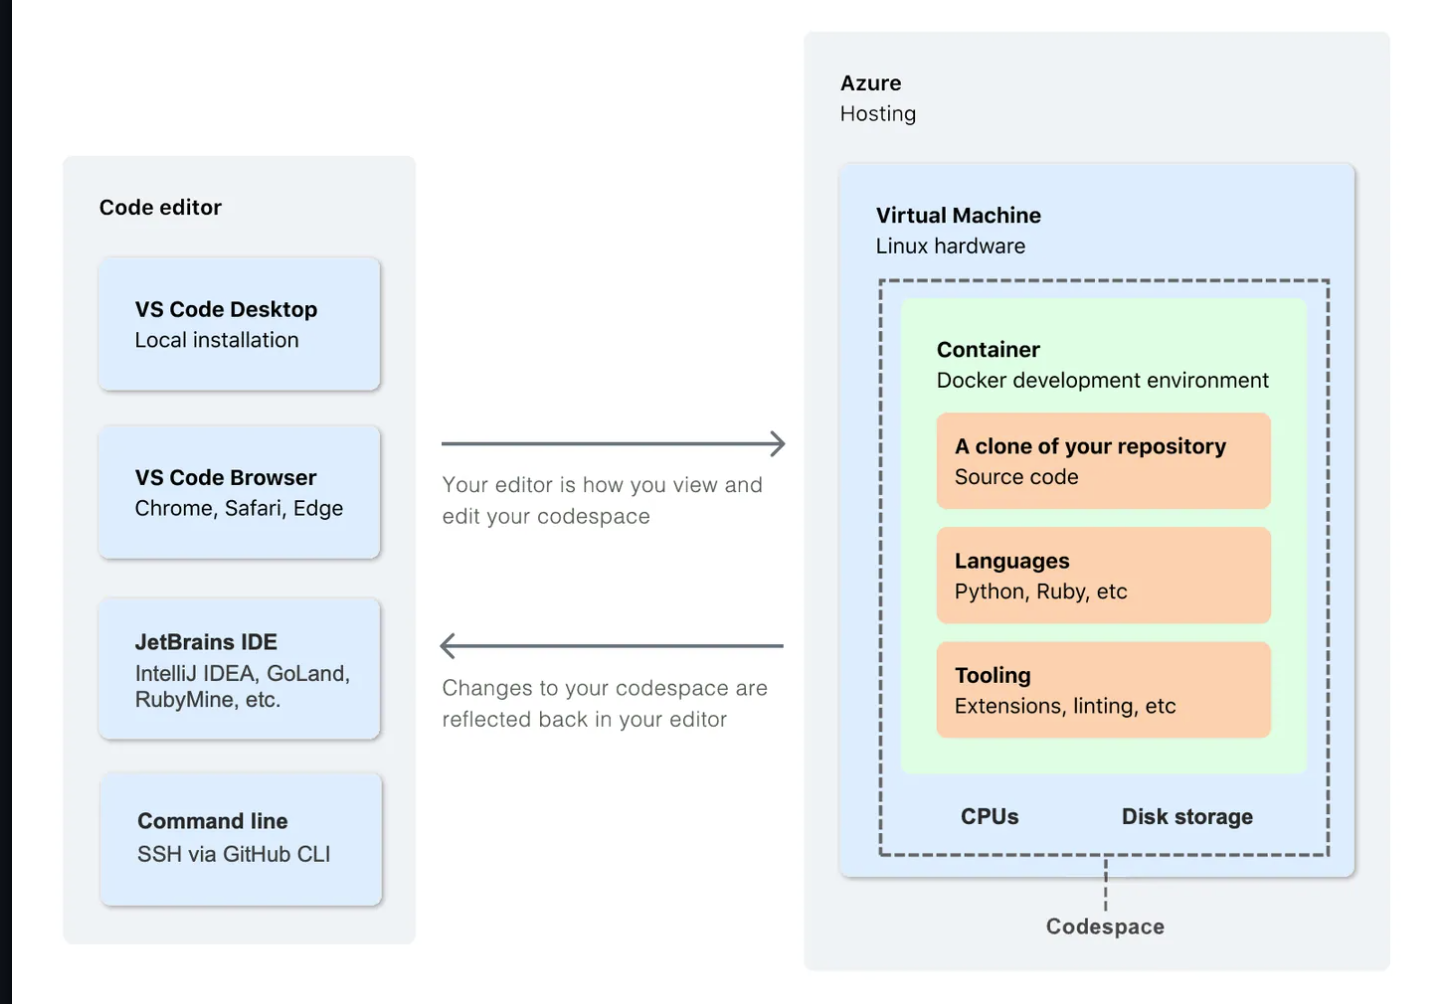
A codespace is a development environment that’s hosted in the cloud. You can customize your project for GitHub Codespaces by committing configuration files to your repository (often known as Configuration-as-Code), which creates a repeatable codespace configuration for all users of your project.
You can connect to your codespaces from your browser, from Visual Studio Code, from the JetBrains Gateway application, or by using GitHub CLI. When you connect, you are placed within the Docker container. You have limited access to the outer Linux virtual machine host.
Azure workspace
In azure, workspaces take a more collaborative definition and more geared towards machine learning. For machine learning teams, the workspace is a place to organize their work. For machine learning team leads and administrators, workspaces serve as containers for access management, cost management, and data isolation. Your workspace keeps a history of all training runs, with logs, metrics, output, lineage metadata, and a snapshot of your scripts. As you perform tasks in Azure Machine Learning, artifacts are generated. Their metadata and data are stored in the workspace and on its associated resources.
@todo refresh azure subscription
Why use github workspace in vs code
Anybody who has implemented a machine learning project has interacted with jupyter notebooks, and if you arent familiar here is an introductory and comprehensive guide to jupyter notebooks. There are many frontends you can use to interact with your jupyter notebook, from your web browser to vs code itself. If you prefer to keep all your development within a single window, you might prefer vs code’s notebook rendering features.
However, as I mentioned above sometimes you might not just have the juice(and if you do please share this with the intel pentium users :) to perform intensive machine learnng tasks such as CNN training. When using jupyter notebooks in vs code, you have the option to use a different kernel and sometimes even remote kernels. In the event you might need a more powerful GPU you may proceed to use google colab’s server instance. This is a whole other different process outlined here
how to use github workspaces in vs code
Now that you are convinced you might need a github workspace kernel. To use Visual Studio Code to create, manage, work in, and delete codespaces, you need to install the codespaces extension. By default, if you create a new codespace on GitHub.com, it will open in the browser. If you would prefer to open any new codespaces in VS Code automatically, you can set your default editor to be VS Code.
prerequisites
The GitHub Codespaces extension requires VS Code October 2020 Release 1.51 or later.
- Use the Visual Studio Code Marketplace to install the GitHub Codespaces extension.
- In VS Code, in the Activity Bar, click the Remote Explorer icon.
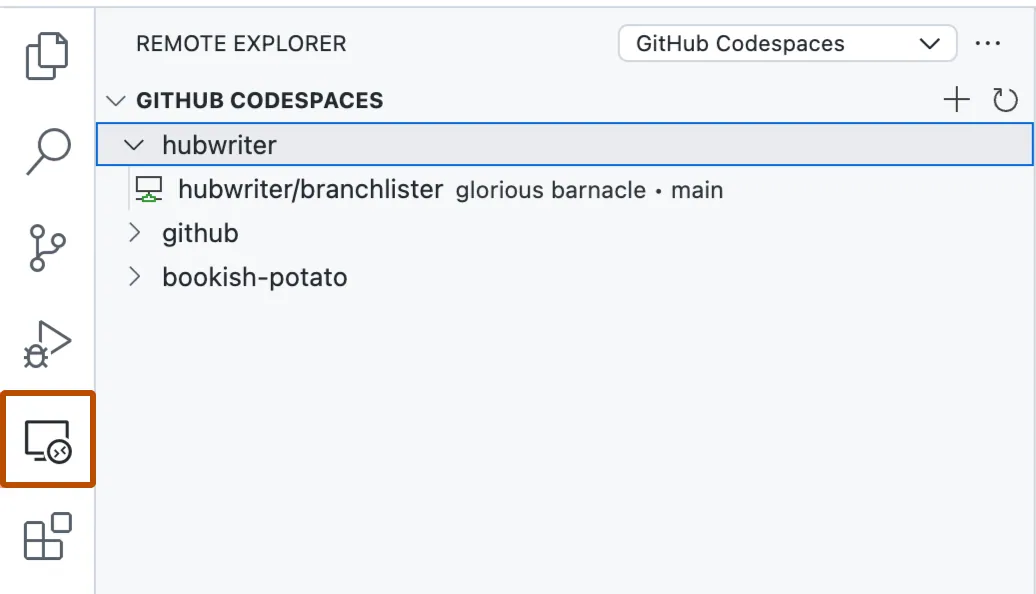
NOTE: If the Remote Explorer is not displayed in the Activity Bar:
a. Access the Command Palette. For example, by pressingShift+Command+P(Mac) /Ctrl+Shift+P(Windows/Linux).
b. Type:details. and click codespace details. - Select “GitHub Codespaces” from the dropdown at the top of the “Remote Explorer” side bar, if it is not already selected.
- Click Sign in to GitHub.If you are not currently signed in to GitHub you’ll be prompted to do so. Go ahead and sign in.
- When you’re prompted to specify what you want to authorize, click the Authorize button for “GitHub.”
- If the authorization page is displayed, click Authorize Visual-Studio-Code.
creating a workspace
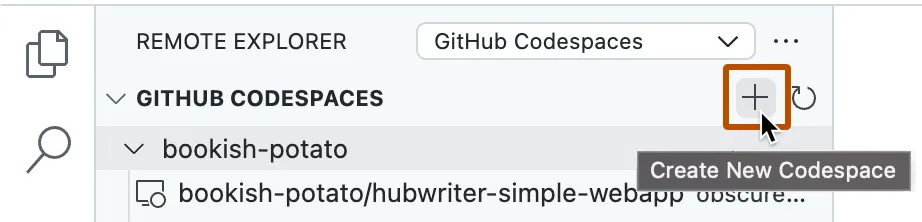
- Click the “remote explorer” window.
- click the add icon.
- In the text box type the name of the repository you want to develop in.

- A message is displayed at the right side of subsequent prompts telling you who will pay for the codespace.

- Click the branch you want to develop on.
- If prompted to choose a dev container configuration file, choose a file from the list.
- Click the machine type you want to use.
NOTE:Your choice of available machine types may be limited by a number of factors. These can include a policy configured for your organization, or a minimum machine type specification for your repository.
Using the workspace with jupyter notebooks
If you followed the above instructions faithfully you should now have an active workspace that you can share with colleagues or access via web browser. To use this with jupyter notebooks:
- create your
notebook.ipynbfile. - Open the notebook within vs code, by default there will be no kernel selected.Click the
select kernelbutton .
. - When the kernel selection window show up click the
select another kerneloption,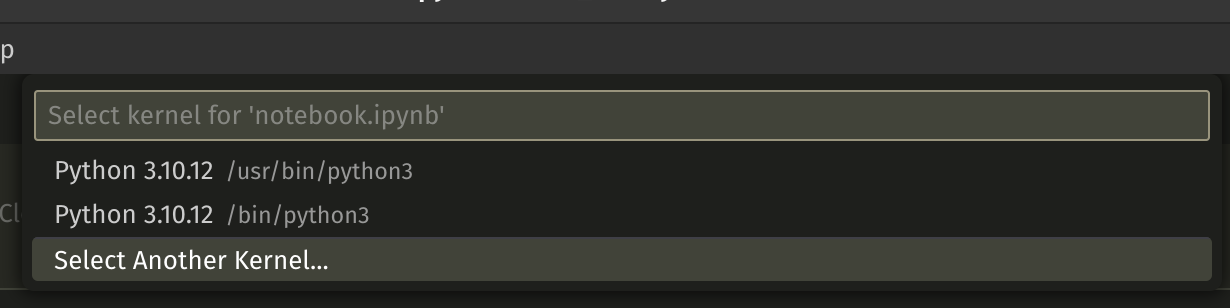
- Click the
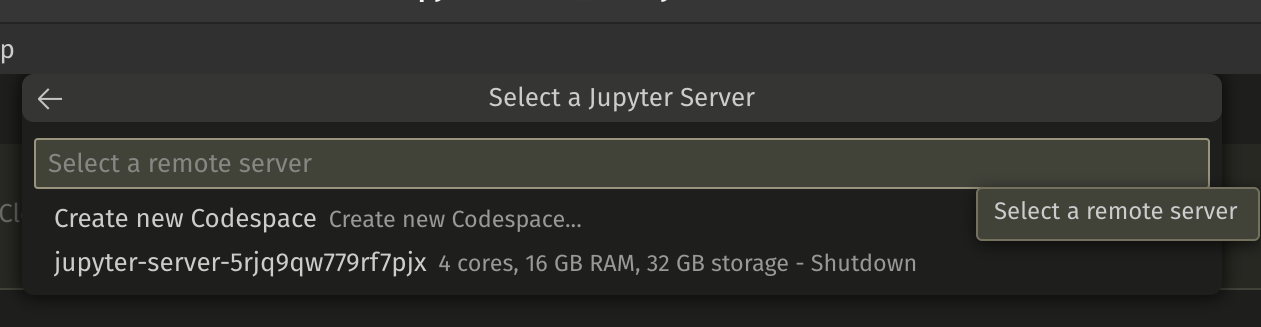
connect to codespaceoption.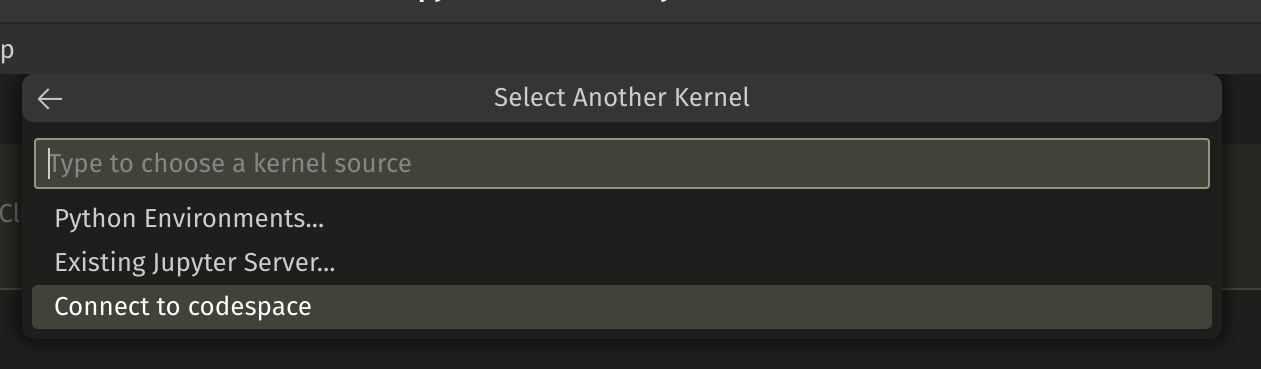
- it will take a short while to load and provide you with kernels you can choose.
- Bingo, now you have a codespace that works with your jupyter notebook. You are now a certified machine learning engineer. Let the whole of Linkedin know about your super major achievement.